The winter months can become very hard on your home. Problems always arise during the winter months, and always seem more expensive. Start at the first sign of winter, so you will have fewer repairs to make yourself through them cold winter months. Doing this yourself can save you a lot of money in the long run.
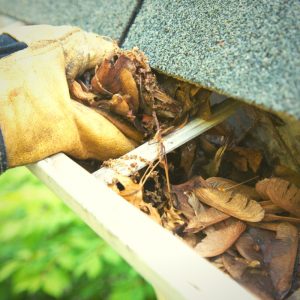 Tip #1- Clean Gutters / Fix Cracks
You should make sure all debris are cleaned from your gutters right before winter starts and then once in the middle of winter. I have found the easiest way to clean these if with a small set of garden tools. Use the shovel to scrape the leaves out of there. Then use the small rake they give you to help. Once you have removed it all, take a garden hose and spray it off, making sure the water drains correctly. If you have cracks in your gutters then purchase some putty to fill in these cracks. Water damage can cost a lot of money. When it snows, that water needs a place to go. If your water has no place to go, then its going to sit on your house, and your going to have a bigger problem on your hands.
 Tip #2- Waterproof Wood
If you have a deck or a porch that’s made from wood, you should waterproof it. When it snows this water can damage your wood. Along with salt you throw down. If you waterproof it, it helps repel the water and it also provides some shield from the harmful salt. They sell easy waterproof things. You can either rent a spray gun, and get it done fast and easy, or you can buy the kind that you paint on just like a can of paint. This can save you a lot of time next summer. You won’t have to replace all the rotten wood.
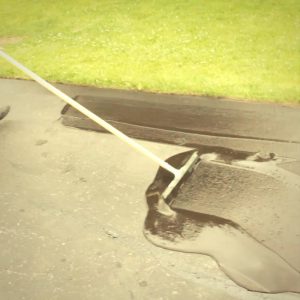 Tip #3- Asphalt Driveways
Don’t forget you should also winter proof your driveway. If you have any cracks in your driveway, then get a crack and joint filler at your hardware store, so you can fix the cracks. If you don’t fix these cracks, they will be 10 times bigger by the time winter is over with. Water, ice and especially salt will get into these cracks, and slowly eat away the edges and make these cracks larger. Once that has dried, you should use asphalt sealant so you can weatherproof it. This can be easily sprayed or painted on.
 Tip #4- Outside Faucet
Make sure you winter proof this as well. If you don’t, it can freeze and crack. You should turn this off from the main shut off valve. Just turning the nozzle won’t cut it. We never knew this, and last year, ours froze and busted. The sad part is, we argued about it for a few days before knowing it had broke. I kept telling my husband, we had a leak somewhere, I could hear water running. He kept telling me no, I was basically crazy. A few days later, I went out back, and it was like a homemade ice ring. We have a craw space, or else our house would have been partly flooded. They also sell thick plastic covers to cover your faucet. We have one, and will be doing all this at the end of summer. You don’t even want to know what our water bill was like for them few days of running water non-stop.
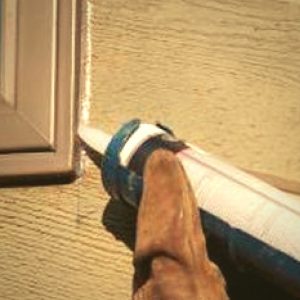 Tip #5- Caulk Siding
You should have a caulk gun ready with general winter caulk and start walking around your home. Place caulk around your dryer vent and any other vents you have on the outside of your home. Caulk around any pipes or wires sticking out of your house. This way you can prevent any air from seeping in. This will save money on your bills throughout the winter months.
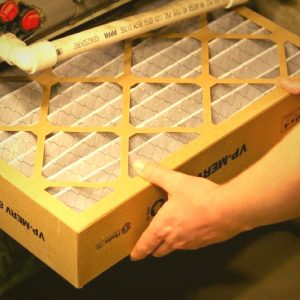 Tip #6- Furnaces
Turn your furnace on and make sure everything is working correctly. If not, get it fixed as soon as possible. If it’s working fine, then turn it back off and take the front panel off it. Take out your filter, and vacuum out the inside of the furnace. I use the smallest attachment on my vacuum, so I don’t hit any wires on accident. If you have coil in there, use a soft brush. You do not want to bend these coils. Place a brand new filter in your furnace and place cover back on. You should also vacuum out all your vents and cold air return. This saves on the heat bill and you won’t believe how less often you will have to dust your home in the winter.
Some simple DIY Furnace Repair Tips
 Tip #7- Windows
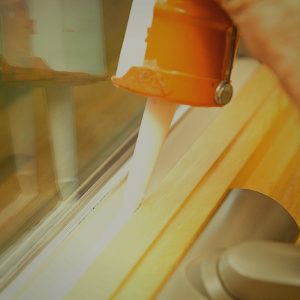
Close all storm windows and lock all your windows since you won’t be opening these for while. Wash everything down. Go around the outside with window caulk and caulk all around the window frames. Also where the glass goes into the frame, caulk around that also. You may need to use a different kind of caulk. I like to use the window putty for around the glass. I can form this with my fingers and it’s easier to keep off the glass when you’re using your fingers.
Learn how to pick the right caulk here
 Tip #8- Trees
If you have any large trees outside around your home, then you should take care of these also. Any lower branches or thin branches should be cut off. If anything looks like its dead, then you should cut these down also. Snow is very heavy when it piles up. So it will weigh these branches down and snap them right off the tree. This could end up being a big mess if the trees are close to your home. They can go through windows, damage roofs, damage siding, car and much more.
Our Pruning Guide can help you out
 Tip #9- Attic
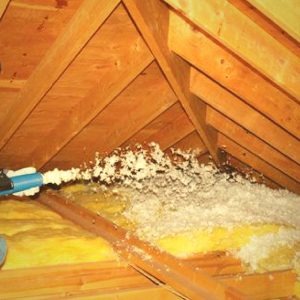
If you have an attack then you should make sure your attack has no leaks and is well insulated. You should have a few inches of insulation in your attic. Heat rises, and you don’t want it to rise right out of your home. This will end up a complete waste and cause your furnace to kick on more often then it should.
 Tip #10- Pipes
If you have a problem with pipes freezing in the winter months like I do, then you need to do something about it. If your pipes stay frozen for to long, they could burst, and that could end up being a very messy and expensive problem. They sell pipe insulation that’s easy to use. Its basically long strips of foam, the kind we had on bikes as kids. Its round like your pipes and has a small slit, so you can fit it over the pipe. They also sell heat tape. This is a tape you wrap around your pipes and then it plus into an outlet. This kind makes me nervous for under my house, but if it’s a pipe inside where you can see it, then it may be the way to go.
If you forget to properly winterize your pipes, fix the leak here
The post 10 DIY Winter Home Repairs appeared first on All around the house.
from All around the house http://allaroundthe.house/10-diy-winter-home-repairs/
via IFTTT
Comments
Post a Comment