The garage is a very important part of your house. It is not only the room where you keep your car but it can be used also as a storeroom. In the garage you keep things that you do not use everyday or things that you want to dispose of later on. Sporting equipment is usually stored in your garage. Also, a lot of people use the garage as a laundry, a workshop or even as a home office. The growing importance of the garage has increased the number of remodeled garages through the past years. Garages are becoming an integral part of the house.
One of the things that need to be changed when planning to remodel your garage is the floor. Concrete floors serve the purpose of flooring but do not look good, even if you paint it, the floor will look bare. It is best to have a garage expert adviser to do the job. The best type of garage floor is made of specially formulated polyvinyl, this special material for flooring conceals cracks and protects the floor from getting stained. This flooring protects the floor from accidental spills: oil, battery acid, grease and any other dirt that gets into your garage.
![]() In order to do the sealing yourself you need several materials and tools:
In order to do the sealing yourself you need several materials and tools:
 In order to do the sealing yourself you need several materials and tools:
- safety supplies,
- a stiff brush,
- a bucket,
- a paintbrush,
- paint roller with extension handle and tray,
- medium nap roller cover,
- a concrete degreaser
- concrete sealer. Usually ½ gallon of sealer is used for approximately 100 square feet.
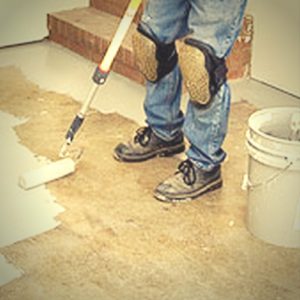
Before sealing you have to clean the floor because it has to be free of dirt, grease and oil. To do this you should use a stiff scrub brush to apply the cleaner and concrete degreaser according to the instructions. Allow the solution to lay on the floor for 15 to 20 minutes more for stubborn stains after scrubbing. After this you should rinse thoroughly with clear water. You may need several applications. Many concrete sealers contain hazardous chemicals that may be harmful to skin and eyes and the vapors are not safe to breathe but the vast majority are acrylic.
Protective equipment to wear when sealing your garage floor:
![]() Neoprene gloves
Neoprene gloves- Protective clothing
- Knee pads
- Safety goggles
- Respirator with both organic-vapor and solid-particle filter cartridges
 Neoprene gloves
During the process of sealing the floor you should continuously ventilate the garage by opening all doors and windows and also using a fan would be a great idea.
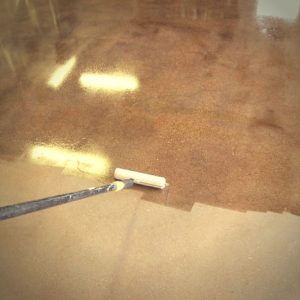
After cleaning and drying the concrete, the sealer has to be applied. The sealer should be tested in an inconspicuous area before applying. Some uneven density in the concrete may result in light/dark appearance that may be objectionable. By using a medium-nap paint roller with an extension handle, it makes it easier to apply sealer. Start in a rear corner continuing to work your way out of the garage. Before doing anything else you should allow the sealer to dry as indicated on the sealer bottle, usually for a few hours.
For a driveway the procedure is essentially the same but it would be quicker to use a garden sprayer to apply the sealer to a large driveway. You should act with caution not to over spray on other material due to the high risk of staining.
By making a few minor changes to your garage you can transform it into an attractive storage room.
The post Sealing a garage floor appeared first on All around the house.
from All around the house http://allaroundthe.house/sealing-garage-floor/
via IFTTT
Comments
Post a Comment