
A water level is the most simple yet the most accurate of leveling tools. It’s also inexpensive and can be made in just a few minutes. Sound too good to be true? Not so! There are two types – the solo model and the helper model (2 person operation).
Why does this simple tool work and why is it more accurate than a spirit level? A simple physical law: water seeks its own level.
This makes it a perfect tool when installing chair rail, attaching a ledger board for a backyard deck, or nailing up wall molding when installing a suspended acoustical ceiling.
How to Make and use a Water Level
Water Level Material List
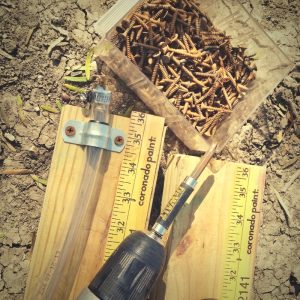
- A Length of clear surgical plastic tubing, 3/8” – 1/2” I.D. (Inside Dimension). The length depends on the project but 30′ is optimal.
- Food coloring
- 5 gallon plastic bucket with a sturdy handle (helper model)
- Silicone caulk (helper model)
- 1 or 2 clamps
![]() Assemble the Solo Level
Assemble the Solo Level
 Assemble the Solo Level
There’s really no assembly to speak of with the helper model. Simply:
- Fill the tubing with water with some food coloring.
- Fill it so that there’s about 1′ air on either end.
- Bend over and clamps both ends to prevent leakage.
Assemble the Helper Model
- For the helper model, drill a hole near the bottom of the bucket that’s slightly smaller than the O.D. (Outside Dimension) of the tube.
- Insert one end of the tube into the hole and pull it in to about the center of the bucket.
- Apply silicone caulk at the hole/tube on the inside and outside and let it dry thoroughly.
- Bend over and clamp the other end of the tube.
- Squirt some food coloring in the bucket and fill with water.
- Set the bucket on a chair or other object.
- Unclamp the far end of the tube and let the water run through until there are no bubbles in the tube.
- Add water to the bucket as needed.
![]() Using the Solo Water Level
Using the Solo Water Level
 Using the Solo Water Level
- First be sure there are no air bubbles.
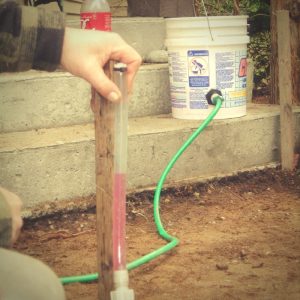
- Set the bucket on an object that is high enough to make working comfortable. The marks that will be make are reference marks; in other words, these are simply marks to measure up to or down from.
- Work around the room, marking all relevant points. Hold the working end of the tube vertically on the wall and allow the level to settle. Notice that the water is slightly concave in the tube? This is normal. Just stick with the high spot or the low spot.
Using the Helper Water Level
- Again, be sure there are no air bubbles in the tubing.
- One person holds the waterline on a mark in one room and the other person marks the wall at the relevant points. Just move the tube up and down to tweak it.
Things that will Affect Level Accuracy
- Air bubbles displace the water and throw accuracy off.
- If adding water on the next project to “top it off”, allow the temperature to stabilize as this affects the density of the water.
The post How to Make and use a Water Level appeared first on All around the house.
from All around the house http://allaroundthe.house/diy-water-level/
via IFTTT
Comments
Post a Comment